1. Tips for Cutting Your Dog’s Nails

    October 9, 2017 by Susan Marett

    It can be tough as nails to give that mani-pedi to our dogs! Many dogs dislike nail trimming, and dogs who are truly tolerant are in the minority. Nail length, however, contributes to overall health and wellness. Ideally, you won’t be able to hear that tell tell click on the floor as your dog comes to greet you. If you can hear him walking about, his nails are too long.

    When a dog’s nail makes contact with the floor or ground, the nail is pushed into the nail bed. This can result in pressure on the toe joint or force the toe to twist sideways. Sore, even arthritic toes make moving and even standing painful — and throw off a dog’s balance. Long nails can also chip and break in ways that require veterinary treatment. Read our tips below so that nail trimming is less stressful for both of you!

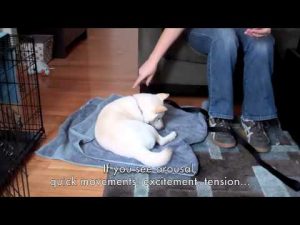
    Desensitize your dog to his feet being handled. Advice to simply ‘play with’ your puppy’s or dog’s feet is not necessarily enough. For nail trimming, your dog will need to accept his paw being held for several seconds. Here’s a video that breaks desensitization down into small steps. Keep in mind that desensitization can take days or weeks.

    Choose nail trimmers. Do you want to use scissor nail trimmers, or would you rather use guillotine nail trimmers? Scissor trimmers may be best for large dogs, while guillotine trimmers may be best for medium to small dogs, and typically come with a guard to prevent too much of the nail from being cut. Before you even use them, it’s best to associate the nail trimmers with treats until your dog believes that the appearance of the trimmers means the beginning of a treat party!

    Alternately, consider using a Dremel to grind your dog’s nails. The finished result will be much smoother, and some dogs tolerate a Dremel better than nail trimmers. Patricia McConnell’s blog post “The Nail Wars” theorizes that the “click” of trimmers becomes aversive for some dogs over time… especially if you’ve quicked a nail. Here’s a video on introducing your dog to the Dremel. Note exactly how you should hold a paw when using a trimmer or a Dremel at the 38 second mark.

    Know where you’re cutting. Check out these two graphics for traditional and alternative ways to trim a nail from Susan Garrett. Remember to trim from top to bottom, not from side to side. If you’re unsure about where the quick is — the quick is the pink ‘live’ area and contains blood vessels — be conservative and just trim a small amount.

    Be prepared to treat a ‘quicked’ nail. Even groomers and veterinarians quick nails, so have styptic powder at the ready if you cut your dog’s nail too short. Cup a bit of the powder in your palm (or in a pinch use cornstarch) and gently press the nail into the powder. You can also use a styptic pen. Either way, these products will help the blood to coagulate and stop additional bleeding. Keep it happy and light — no freak outs please — and continue giving your dog lots of treats throughout the incident.

    Ready to create your own home spa?


  2. When Tough Love Isn’t Tough at All…

    September 10, 2017 by Susan Marett
     

    Do you have a dog who is fearful around strangers, children, or other dogs? If you believe in the tough love approach, you may introduce your dog repeatedly to strange people or to children — even if your dog continues to back away, try to avoid them, or display fearful body language. Perhaps you keep going back to the dog park, determined to socialize your dog no matter what. No wimpy dogs allowed!

    Forcing a dog to confront her fears over and over again is called flooding. “Flooding exposes a dog to a trigger in a way that immerses her, as she is simultaneously prevented from escaping.” Help For Your Fearful Dog by Nicole Wilde. Flooding can sometimes cause sensitization, an increase in fear. Do you remember the snake scene from Indiana Jones’ Raiders of the Lost Ark? The character of Indiana Jones is famously afraid of snakes, but becoming trapped in a pit of snakes doesn’t do much to improve his opinion of them! It’s a great example of flooding…

    There is, thankfully, a better way. There is a way to help our dogs overcome their fears without worsening those fears, increasing anxiety, or even destroying their trust in us. That way is called counterconditioning and desensitization. To quote Help for Your Fearful Dog

    “Desensitization exposes a dog to a fear trigger in a gradual, incremental manner. The process begins at a level low enough to avoid a fearful response, and builds incrementally to the level that originally frightened the dog… Counterconditioning seeks to change an unpleasant emotional response to a trigger into a pleasant one. Once the dog’s underlying emotional response changes, her reaction toward the trigger will change as well. Counterconditioning is accomplished by pairing a trigger with something the dog perceives as wonderful.”

    To create your own program for desensitization and counterconditioning, follow these steps:

    Determine specifically what frightens your dog. Is it men with hats, teenagers on skateboards, children under the age of six, large dogs over 60# but not small dogs? It’s important to be as specific as possible.

    Make a list of reinforcers that really motivate your dog. It might be food, but it could also be a tennis ball or squeaky toy — or perhaps play or interaction with you. If food is high on your dog’s list, go with highly palatable food such as chicken, cheese, hotdogs, freeze-dried liver, or ham in tiny pea-sized pieces.

    Find your dog’s threshold. The threshold is the distance at which your dog is aware of the trigger (stranger, child, dog, etc) but is not concerned or showing signs of fear.

    Locate great training spots. Sometimes it’s best to start outside of your neighborhood. At home, your dog may be bracing for the neighbor’s dog to race out to the edge of his invisible fence, or scan constantly for cyclists or joggers. A new location can be a beautiful blank slate! Make sure that your training sites give you lots of space — helpful if you need to increase distance to keep your dog under threshold.

    Get started by paying close attention to your dog. As soon as your dog sees the trigger, feed treats quickly, one after another. It doesn’t hurt to speak in a happy tone of voice simultaneously as well! And when the trigger disappears, you guessed it, the treats and happy talk stop too. For more information about this process, check out The Cautious Canine by Patricia McConnell.

    ________________________

    At the end of the day, we all want our dogs to be comfortable and to feel safe. We want them to enjoy being dogs and to enjoy being out in the world. Carefully choosing our training methods can help us to build confidence rather than breaking it down. Thank you so much for reading and have a great weekend!


  3. Alfresco Dining and Your Dog

    August 13, 2017 by Susan Marett


    Summer is in full swing… a great time to grab a meal or drink with family and friends. Add our sunny weather and your dog and it’s just about perfect! What can make it less than perfect? Your dog acting rowdy or rude on the restaurant patio. So what does your dog need to be a great mealtime companion?

    – A terrific sit stay A great “sit stay” is a cure-all for many problems. Would you prefer your dog to sit instead of jumping on the waiter or waitress, hang out patiently before you’re seated at a table, or wait calmly for you to find your phone and car keys? Train a sit stay and these problems (and more) are solved. Sit stay is the command to accomplish all of those goals, and a great way to calmly transition your dog from one activity to another.

    – An understanding of the “place” cue “Place” is a terrific command for settling your dog in one spot. Bringing along a bed or mat, and laying it out at your feet or near your table, clearly defines where you’d like your pup to chill out — and helps you to relax as well! Video here.

    – The ability to “leave it” Ohhh yes… Eyeing that nacho as it moves from plate to mouth, snuffling under your table for the french fry that dropped? “Leave it” cues your dog to back off, to cease and desist, and just generally to forget about cleaning off your plate.

    – Friendliness and steadiness Basic friendliness and a calm demeanor is super important for dining out. Your dog may want to be with you, but may not want lots of activity, loud music, children running by your table, or car traffic in close proximity. Be realistic, and if your dog is already steady in that type of environment — make that reservation! If not, work towards your goal by starting with quieter cafes and restaurants at their slowest times. Read more here.

    – A comfortable spot Your dog needs shade, water, and enough space to lie down comfortably. When you sit down to chow down, make sure that your dog will be comfortable and cool for the entire meal. If your dog is a puppy or a young adult, consider a walk before hitting the restaurant — taking the ‘edge’ off will help him to settle faster. Bringing a stuffed Kong or chew bone along can help too… just like a coloring book for a child.

    Thanks for reading and bon appetit!


  4. Teach Your Dog to Heel

    June 15, 2017 by Susan Marett

    This week we’re offering up tips to teach formal heeling. What is heeling exactly?

    Heeling is the most formal and precise way to walk a dog, and requires the most attention from our dogs. It’s incredibly useful when walking your dog through crowds or down busy streets, or when you’d like your dog to focus on you rather than on a potential four-legged friend. We can define heeling as the dog walking parallel to the handler, no more than six inches between dog and handler, and the dog’s ear (or shoulder) lined up with the handler’s leg.

    Left Side or Right Side? We often think of heeling as our dog walking on our left side. Why the left side? Well… we’re living in a mostly right-handed world, and most dog handlers are right-handed. Dog training has its roots in hunting, military, and herding traditions — so keeping a right hand free for guns or equipment has tremendous value. When a handler with a firearm has his or her dog on the left, this can also protect the dogs from ejected shells and cartridge cases. Last, having a dog heel on the left can keep him on the curb or at least further away from the flow of traffic. Bottom line… go with your preference and stick with that side consistently.

    Teach Heel Position You may have heard the term “finish” when attending a training class. Teaching a finish, or flip finish, can be accomplished by following the steps here. Like to see it in action? Watch the steps in this video. Really, really want to nail down heel position? Okay, we warned you… check this video out!


    Make Heeling Fun As Ian Dunbar has written, “For many dogs, unfortunately, on-leash heeling is the most unpleasant command (having the highest correction/command ratio of any other obedience instruction), so much so, that heeling around the block becomes a drag in both senses of the word. The dog must think there is a jerk at both ends of the leash.” Yikes! It really is possible for your dog to enjoy learning how to heel — just keep in mind that it isn’t necessarily natural for your dog AND that it takes a lot of practice for a dog to heel well. And on that note…

    Use Treats or Toys so that your dog is motivated to pay attention and to move with you. There are many variations on how to train heeling, and here’s a few: teach heel by training your dog to follow you off-leash first, teach heel by having your dog follow a lure, or teach attention then heeling by using a clicker. Have a small dog under 25 pounds? Check out these tips for working with your pint-sized pup!

    By Susan Marett


  5. Get Your Gear for Great Walks

    May 15, 2017 by Susan Marett

    Dog walks are not always as peaceful as the sweet image above! Training collars and harnesses are just that — training equipment not forever equipment — but they can give us a break from intense pulling and lunging. Training equipment can also give us some behavioral traction with dogs who are intensely excited about meeting other dogs and people — as well as confidence when handling dogs who behave in a frustrated or aggressive manner.

    The Sensations Harness is my tool of choice. You can view the Sensations Harness and look at the company’s fit and size guide here. Why do I like it? Easy to fit, easy to use, and little to no acclimation time for the dog. There are lots of similar, front-attached harnesses out there but this one has my vote! One caveat… if you’re running with your dog, allowing him to romp off-leash, or exercising him energetically in any other way — leave his front clip harness off during that time.

    The Thunderleash is a newer player on the scene and — you guessed it — was developed by the company who produce the Thundershirt. The Thunderleash uses pressure on the dog’s chest to discourage pulling. It has a very simple design and is also easy to use — converting quickly back and forth between a regular leash and a no-pull leash.

    Body Harnesses can be terrific for dogs who are escape artists and easily back out of their collars, but they aren’t the best for dogs who pull on leash. Think about the Iditarod… dogs wear body harnesses with leads attached to their backs. This gives them the greatest capacity to pull the sled forward! One thing we don’t want to do is give our dogs more capacity to pull us… So if your dog pulls on leash, go with the Sensations Harness or perhaps the Freedom Harness for back and chest points of attachment.

    Another important benefit of harnesses… the physical well-being of our dogs. When we discuss pulling and lunging, we generally focus on our frustration but not necessarily on the potential for injury. This article sums it up well: neck injuries (bruising, headaches, whiplash, and injuries to trachea and larynx), eye issues (pressure from pulling can worsen corneal issues, glaucoma, and other eye injuries), and thyroid gland (inflammation). Pain from collars or inappropriate equipment also how the potential to increase behavioral issues.

    Head Collars or Halters include Gentle Leaders, Comfort Trainers, Halti Head Halters, and Snoot Loops. Not all dogs are candidates for head halters, but they can sometimes be valuable when working through behavioral issues such as aggression and reactivity — and for dogs who like to launch love attacks at other pedestrians and pups! There is some potential of injury to the neck if a dog hits the end of a leash hard, or if he is given harsh corrections. Here’s one trainer’s view on using them “Are Dog Head Collars Humane? I Changed My Mind.”

    Martingale Collars are not great tools for preventing pulling, but like regular body harnesses, can prevent flight risk dogs from slipping their collars and completing a few victory laps! Dogs can slip their collars not only because they really do want to run free, but also because they startle easily and try to get away. If you have a dog who is environmentally sensitive (scared by cars, bikers, joggers) or is nervous getting out of the car at new places — a martingale collar could be a good choice. Also called greyhound or limited-slip collars, martingale collars are great for dogs with narrow heads (like greyhounds!).

    Flat Collars simply provide a place to attach id tags and a leash. Need to acclimate your puppy to a collar and leash? Start with a basic flat collar or simple harness and when he’s completely comfortable wearing it, also teach your puppy that collar grabs are a great thing! Last, flat collars are the perfect piece of equipment for a dog who understands loose leash walking and/or formal heeling — no restraint or extra control required!

    What is your preferred equipment when out for a walk with your dog? Let me know what makes your walks more peaceful!

    Written by Susan Marett


  6. From Pulling to Polite

    by Susan Marett

    We’re not living in a one size fits all world, and dogs and dog training are no exception. To that end, I’ve listed several methods below as well as a few training tips and pointers:

    Right From the Start One of the best ways to make your life easier and impact the quality of the walk is to train a sit or stand to get ‘dressed.’ Getting dressed may mean putting on a collar or harness and/or clipping on the leash. Either way, getting equipment on a squiggly jumping dog can be frustrating and time-consuming. When you pick up your dog’s equipment, ask for a sit once. If your dog gets up without a verbal release, put the equipment down. Pause for a second or two, then try again. Allow your dog to work through his frustration (and take a lot of deep breaths yourself!). A few minutes of this work can literally translate to years of polite behavior. *Tip* Teaching a small dog to sit or stand on a chair to be leashed up is perfectly acceptable. It can save you from bending over and can limit some of his movement as well.

    Exit Like a Gentleman or Lady You’ve had your dog sit or stand on cue to get his swag on, but now he’s racing out the door like a runaway train. Hold up! As we mentioned above, training polite behavior takes patience but oh! is it sooo worth it. Here are videos one and two that describe simple training for nixing door dashing. Although both videos mention clicker training, you can substitute well-timed praise in the place of a click.

    Exercise First Some pulling on leash happens because our dogs have excess energy and they’re simply in need of exercise. If at all possible during the training phase, try playing fetch in your yard or home, tug of war, or have a quick play session in a dog park before hitting the trail.

    Practice Without Distractions Loose leash walking can be one of the most challenging skills that we teach our dogs. While we tend to introduce and practice other skills initially without distractions, we often start leash walking around tons of distractions. Ruh roh! People, dogs, traffic, squirrels, birds, and etc are all par for the course on a typical walk. Consider the tips in this video, starting inside the house or in an area with very low distractions.

    Penalty Yards So you’ve gotten out of the house and onto the sidewalk in a civilized manner — but your dog has suddenly launched ahead. Time to issue penalty yards! Without jerking your dog, begin backing up, praising and rewarding your dog as soon as he’s following you. If you have his attention, begin moving forward again. Repeat as needed.

    The Canine Cha-Cha as coined by Grisha Stewart is related to playing penalty yards but with [literally] a twist. It’s a bit more proactive rather than just a consequence for pulling. “Teach your dog that any pressure on the leash means that he should return to you. On your walk, even if he is not pulling, suddenly walk backwards. You are walking backwards and he turns around to face you, so he’s walking forwards, but the opposite direction of before. When he turns to look where his feet are taking him, give him a treat. Repeat – over and over and over. If he pulls ahead, back up as well.”

    Reward Right Position Whenever your dog is walking at your left or right side (pick the side you prefer and stick with it), praise and reward. Your praise and treat should be given quickly as you continue moving forward. Very small and soft treats as well as a great treat bag help! *Tip* Young puppies don’t multi-task well so they may need to stop and eat, rather than eat and walk.

    Keep me posted on your progress and thanks for reading!

    By Susan Marett


  7. Teach Your Dog to Relax!

    February 25, 2017 by Susan Marett

    We are really really good at training our dogs to perform specific skills, but what about training the ultimate non-performance skill? Simply hanging out in a content and relaxed way? How are we at training that? Let’s call this the skill of doing nothing.

    Below I’ve detailed one skill and one concept that can get your dog to that zen state of mind… Just being and being with you! Let’s get started:

    Go to Your Mat

    Go to Your Mat is a great skill for teaching a dog to relax in a specific place. Here’s a quick overview:

    Step 1. Working within one or two feet of the mat, and your dog at your side, say “Go to your mat” in a cheerful tone of voice, pause, then toss the treat to the mat.

    Step 2. As soon as your dog has two or more paws on the mat, treat again on the mat.

    Step 3. Tell your dog, “Down.” Give the hand signal or lure it if your dog needs help. When he lies down, treat him. Continue to treat to keep your dog on the mat. After a few seconds, tell your dog, “Okay,” and allow him to get up.

    Step 4. Release your dog, and set up to practice again, repeating until your dog begins to go to mat when you say, “Go to your mat,” before tossing the treat.

    Now that you and your dog have mastered the basics, begin looking for the following signs of relaxation. All of these signs can be marked with a clicker or verbal secondary reinforcer and rewarded. These are from Laura VanArendonk Baugh’s terrific book Fired Up, Frantic, and Freaked Out: Training Crazy Dogs from Over the Top to Under Control.

    Head lowering to mat, chin resting on leg or mat

    Tail uncurling or resting on floor

    Hip rocking to one side

    Hind legs slipping further from body

    Hind legs extending behind body (“frog legs”)

    Sighing

    Blinking and soft eyes

    Ears Relaxing

    Rolling onto one side

    Here are two videos from Sarah Owings on teaching “Go to Your Mat.

    There are so many uses for “Go to Your Mat.” Need your dog to be calm when visitors arrive, chill at the vet’s office, relaxed at the local pub? Go to Your Mat can help in all of those scenarios and more!

    Next up… Capture Calmness

    Is it tough for your dog to relax? Do you feel that your dog has two speeds? One is “floor it” to maximum speed and one is asleep? Try “capturing calmness.” Coined by Emily Larlham, capturing calmness refers to “catching” your dog being calm, and reinforcing it to create a default settle. Videos below:

    And finally, don’t forget that dogs do need plenty of exercise (both physical and mental), obedience training, and management to be a civilized family member rather than a wild child. If you’re fulfilling these needs, and add the exercises above, you’ll have a dog that can do a lot with you, and do nothing with you too!

    By Susan Marett


  8. The Long List of Ways to Use a Long Line

    January 20, 2017 by Susan Marett

    In this week’s 5 Paw Friday, we’re chatting about the many uses and benefits of using a long training lead or long line especially for working on the cue “come.” I often use my long line with dogs a few times a day, and frequently hear “Wow! That’s a really long leash!” from passerbys.

    So why on earth would you want to use a long line for dog training. Lemme explain a little…

    Long lines allow for…

    • Training sessions with your dog that can mimic your dog working off-leash.
    • Safety in open spaces without fencing
    • Adherence to leash laws *although* some areas (including our local beaches) will limit the number of feet that a leash or line can be.
    • Assessment of recalls with distractions
    • Ability to increase the difficulty of distractions while still setting up your dog for success
    • Practice of other skills such as sit and down stay, leave it, and wait at a distance
    • Greater exercise and exploration… Exploration is great for building a shy and fearful’s dog’s confidence and encourages more independence and curiosity.

    The Downsides of Long Lines are…

    • The handler must be relatively strong and balanced/steady to handle a dog on a long line.
    • Dogs must have a good foundation for “come” before being worked on a long line.
    • Use of a long line requires attention! It’s easy to get wrapped up in a long line and pulled down.
    • If you grab a long line while your dog is moving fast, you risk rope burns on your hands. Some handlers use gloves for protection!

    Here are a few tips on using a long line…

    • Don’t jerk a dog for not coming to you; instead, gently prompt your dog to come with just a small amount of movement with the line i.e. “Hey! Remember me? I’m right back here.” When working around distractions, or when your dog is deeply involved in sniffing an area and the brain has moved completely down to his nose, a light reminder is often all that’s needed to get his attention. It should have a ‘polite’ quality just like when your friend taps you on the shoulder.
    • Dogs can take off very quickly, and before you blink, have traveled 30 + feet away. Don’t jerk a dog when he’s running at high speed, or attempt to stop him abruptly if at all possible. Even when you are paying close attention to your dog, it’s certainly possible that he’ll see something and sprint off quickly. For this reason, it’s a great idea to use a body harness with the ring over the back, not centered on your dog’s chest. It’s also extremely important to avoid using Gentle Leaders or any other brand of head halters.
    • Stick to the basics: Say your dog’s name and then pause to make sure that you have his attention. All systems go? Call him once not twice. It’s action time now! Either your action or the dog’s action. If he doesn’t immediately begin to turn towards you and begin moving in, you’ll need to get to him quickly so that you can engage his attention. Be nice, be fun, but make “come” mandatory not optional.
    • Keep “come” fun while training: don’t call the dog away from fun, or to you for punishment or reprimand.
    • Ever feel like a fast food drive-thru? Recall training isn’t about ordering fries with a Big Mac, it’s about getting to you and staying with you. Be ready to focus your dog when he reaches you, and don’t allow drive bys’. Reward for at least three seconds while your dog is attentive and right in front of you. It’s not necessarily about coming in and sitting, but it IS about coming and making a stop!

    Thanks for reading! For more tips, view Grisha Stewart’s video below.

    By Susan Marett


  9. The Perfect Canine Host

    October 25, 2015 by Susan Marett

    Having a Dog Who is Enjoyable to Guests, and Enjoys Guests Too!

    We feel your pain! We often talk to clients about the stress of having people over, and wanting your dog to be the perfect host, able to greet politely when friends and fam come to the door, allowing guests to nosh without bothering them, and a cool customer when it comes to hanging out. Here are our quick and dirty problem-solving tips:

    A polite “hello and pleased to meet you!”

    Before your guests arrive, get out the treats. Whoops! Is that a bowl of treats for the guests? Nope, not chocolate but dog treats to get your dog’s attention and a civilized sit at the door. Having your dog’s leash on ahead of time is helpful too.

    Yours is yours and mine is mine!

    Ready to serve? Have a scrumptious stuffed Kong (freezing it makes it last longer) to occupy your dog while you and your guests dine. Think peanut butter, fruits and veggies, plain yogurt, dry treats or kibble. Bully sticks and marrow bones are terrific choices as well.

    Sit down and stay awhile

    Everyone settled to watch a movie or the big game? This is a great time to have your pup on his or own dog bed. Teach a “place” cue ahead of time, asking your dog to go to their bed or mat for just a few seconds to start. Keep it short and sweet in the beginning, gradually building up to several minutes or more. Make their bed a happy place by giving treats on the bed.

    Take a spin around the block

    Get those ya-ya’s out with a long walk or play session before guests arrive. Be sure to allow your dog time to relax and come down off the playtime high — but exercise always helps to curb excitement.

    Got a wallflower?

    If you’ve got a shy dog, it’s okay if they skip the party altogether! Get your shy or nervous dog comfy in your bedroom with an irresistible and longlasting chewbone or Kong. Play calming music such as a Through A Dog’s Ear cd — check out www.throughadogsear.com. Wearing a Thundershirt might help your dog feel cozy too.

    Is your dog having a blind date?

    Meet the new visiting dog out of the house and at the curb for a more low-key intro, then take a quick walk together to ‘get to know ya.’ Having all toys and bones put away before the new dog arrives can minimize potential squabbles and make for a more peaceful time.

    Written by Susan Marett and C.C. Bourgeois, originally published in Beau Magazine’s Autumn Issue 2015